Enhancing the AVIC-5000NEX
Introduction
This is the first of a several? part article on my adventures with my aftermarket in-dash navigation unit for my car, a Pioneer AVIC-5000NEX. I want to modify it to remove a nag screen. I will present five different ways of hacking it, explain how to analyze the system to modify its functionality, and hopefully end up constructing an update that other users can use to disable it on their cars.
You can also read part 2.
Backstory
I drive an 11-year old Jetta. It’s not fancy, but one thing I spoiled myself with was an aftermarket head unit / nav system from Pioneer, an AVIC-D1. It’s aging – I bought it about five years ago – but it does the job, with one notable exception:
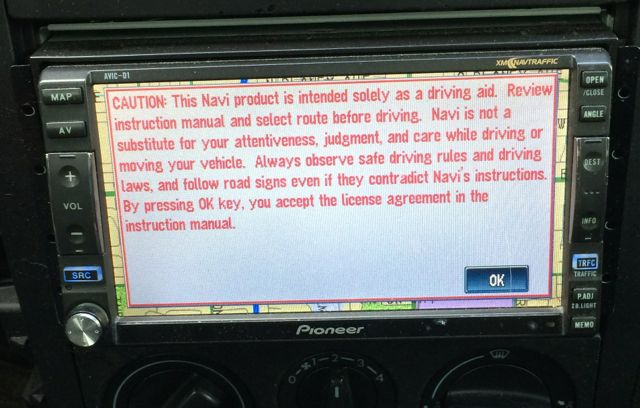
It displays this stupid warning every morning, every time I start my car.
The head unit contains an NEC V830 cpu with some NOR flash, and a DVD-ROM drive that stores the maps. Yearly updates (in the form of new DVDs) are available, and they contain firmware updates. A simple button-press code will let you force it to reinstall the firmware off the disc inserted in the drive.
The most difficult part of this was analyzing the firmware, because the only other (relatively-) common item that used this processor was the Nintendo Virtual Boy. I had to write my own tools to disassemble the firmware. Once I reverse-engineered the CRC scheme it used on the firmware, I was able to modify the firmware, burn it onto a disc and flash it to the device in my dashboard. (This ended up using almost as many blank discs as the Wii did.)
I ended up being able to:
- Modify the text displayed in the warning (not helpful)
- Make the warning text disappear, leaving only the button (not helpful)
- Make the button disappear (extra not-helpful, because there was no way to disable the dialog)
- Make all of the above disappear, leaving a static map and a hang
I eventually got bored with this and gave up, and my car still displays that screen every day. I did have 3 or 4 people contact me over the years and offer to help, but AFAIK nobody had any further luck. From my recollection, the firmware was implemented as a giant state machine with a big function table, and I was unable to get the table references to line up – therefore, I was stuck modifying the behavior of individual states without the ability to change the flow between states. Therefore, I could not bypass the “wait for button press” state.
A newer target
I decided to tackle this problem again with a newer unit in the same series, the AVIC-5000NEX. I chose it because it is supposed to receive a firmware update later this year that will implement CarPlay support (and is one of the few aftermarket solutions that will). I did not know much else about the unit before I bought it.
I bought it for about $600 on eBay, and while I was waiting for it, I looked for anything I could find about it online; I found very little of use – particularly, I found no firmware for it. (What I did accidentally find was schematics and firmware source code for an earlier radio, the AppRadio2
I also tried, and failed, to find a service manual with schematics for it – something that was easy to do for the AVIC-D1. This would have made the rest of this easier, but alas.
I came up with five different ways to attack it:
Option 1 – modify a firmware update
This would have been the easiest approach (cost: $0). However, as of this writing, a firmware update had been promised but did not yet exist. It would also not be a sure bet, as firmware updates are often encrypted and/or signed; also, they are often deltas against an older firmware, and may not contain the code I need to modify to disable the nag screen. Still, more people would be able to use a hack that didn’t require opening the unit up or soldering.
Option 2 – find UART (or maybe USB)
Embedded devices often have debug consoles that are available over 3.3v UART ($5 for a USB to serial converter, 3 or 4 wires) or over USB ($1 for a USB cable, 3 or 4 wires). This is made much easier and more practical if these signals have clearly marked test points, which they ended up not having. This would still be nice to find, maybe someone else can pull it off. (I’ve added some hints for this at the end of this blog post.)
Option 3 – find JTAG
This requires some luck – you need either a clearly marked port (which I had) or some really good guesswork. You will also need a JTAG interface; any FT2232x-based device will do, I used a Bus Blaster ($35) because, again, I had it lying around. You will also need some software, like OpenOCD. This is the approach I ended up taking, but it’s not a sure bet. Freescale has an app note on Secure JTAG for this processor, which would have required implementing a 56-bit challenge/ response scheme, and either buying the Lauterbach (>$10,000) adapter or hacking support into OpenOCD. 56 bits isn’t a tremendously large number, and it might be vulnerable to a timing attack; fortunately, I didn’t have to try it. I would probably have moved on to
Option 4 – sniff SD card
This will only make sense with some context, see below. It would probably have worked for this target, but it requires more hardware – an SD sniffer board, ($10, but not lying around) and a logic analyzer (about $200 and some soldering for my solution).
Option 5 – modify NOR flash
The most drastic approach would have required desoldering the NOR flash that contained the firmware; in this case, that’s a TSOP48 package and would have either required a chip reader plus TSOP socket ($500+), or soldering up 30-40 wires and using something like a Teensy++ with norway ($24 but very difficult to do). This option also carried the largest risk of damaging the unit, and has the most difficult test cycle – desolder, dump, reflash, solder, test, desolder, reflash, solder, test…
It would also not have worked if the target had encrypted the flash, or if it had any flash internal to the SoC.
It arrives
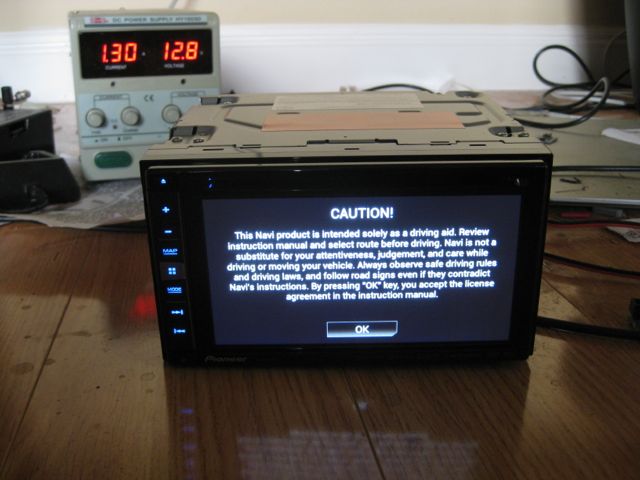
I finally got the unit, and powered it on inside my house to make sure it worked before I voided its warranty. Sure enough:
Some playing around with the menus showed that, as expected, you could update the firmware from a microSD card. There was also a software license agreement acknowledgement menu buried in there, revealing that Pioneer is violating the GPL by using all sorts of open-source stuff without distributing any source code. Most notably, they are using Android with U-Boot.
I opened it up, and was mildly surprised to find an 8GB SD card hiding inside:
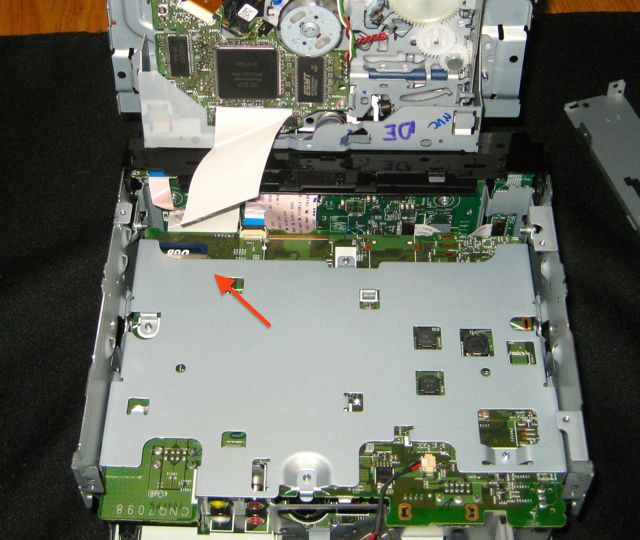
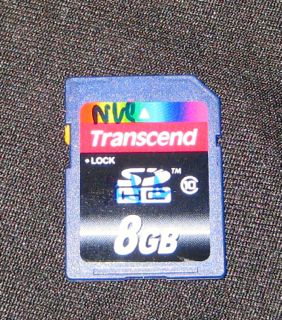
Could it really be that easy? It sure looked like a normal SD card (albeit with some writing on it):
When I removed the card and booted the unit, it only got as far as the splash screen before displaying an error message. This is good news, because it means that the code that displays the warning message is probably on the SD card; maybe we can just modify the SD card!
I put it into my Mac, and got a “Medium Error”; it correctly identified the capacity, but nothing else. Same was true under Linux and with a different SD card reader. Something strange was going on.
CMD42
For a while, I was intimately familiar with the SD Command Spec due to our struggles to support a wide range of SD cards in BootMii. One thing that came to mind was CMD42, a mechanism to set up a password on an SD card. This doesn’t provide “real” security, because it does not actually encrypt the data – if you could pull a bunnie and modify the firmware, you could dump out the data.
More importantly, the system needs to know the password in order to unlock it (meaning it must be stored in internal flash), and it needs to transmit it over the SD bus to the card upon boot. At this point, I went and ordered a SD card sniffer (as well as a bunch of other crap I don’t really need) from SparkFun, but I kept working while I was waiting.
i.MX6
Tearing the unit down further revealed that the processor was located on a daughterboard:
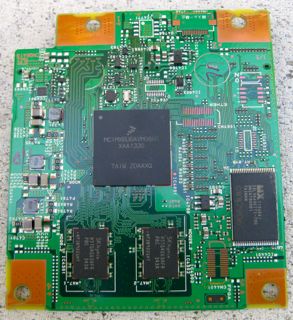
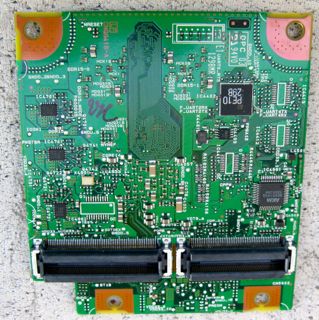
It even had an exposed JTAG port – halleleujah! A nice incidental benefit was that it used the same Freescale i.MX6 series of chips that bunnie used in his Novena, the one I just got from him a couple of weeks ago. This made my JTAG setup much easier, because I could test my setup (hardware and software) against a known-working board for which I had a schematic, and which had unlocked JTAG. If I had not had this, I might have gone and bought a devboard from Freescale for the part. I could even have taken a deep breath and blown a fuse on the Novena to enable secure JTAG, to then try to break it. That could still be a project for a rainy day!
The next step was to solder a bunch of wires to the board:
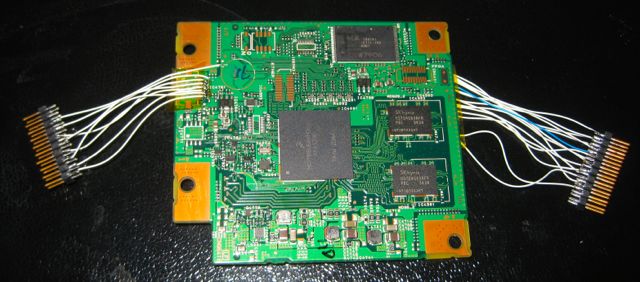
(Ignore the wires to the right; I tried soldering up a bunch of wires to the temptingly-marked FPGA UART signals, but only got a square wave out of one of them.)
Once I put it back together (and finally got it to turn back on), I had to figure out the exact pinout of the JTAG port.
There are a few options in this space – Joe Grand made a device, the jtagulator ($160) to do this, but if you’re willing to write the code yourself you can use pretty much any small microcontroller. I used an mbed ($50) with some code from a friend to do it, because I had the hardware lying around and the code was already written; other people have implemented similar with other simple microcontrollers).
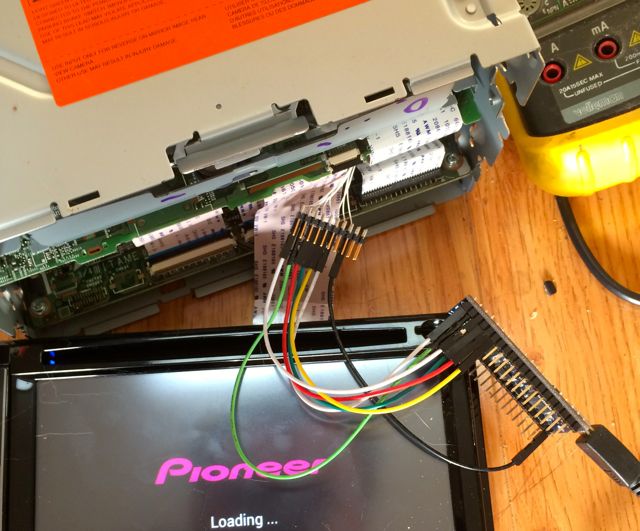
Knowing a little bit about how JTAG works will help here, but the bruteforcing software “just” wiggles some GPIOs. You have to try to narrow down the possible candidates to as few wires as possible – take a look at the PCB:
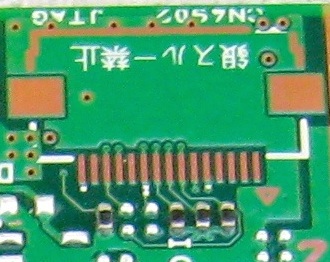
As you can see, there are 8 signals that are actually connected to something. Probing with a multimeter showed that one was +3.3v (Vref) and one was Ground. That left six wires, which matched up with what the i.MX6 datasheet said and the Novena schematic showed – TCK, TMS, TDI, TDO, TRST, and probably nRST.
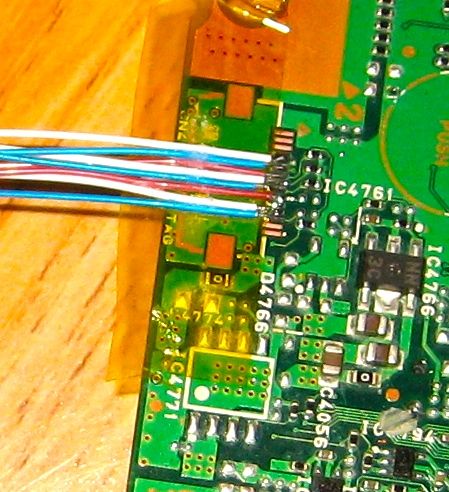
The bruteforcer software takes those 6 wires (not including Vref and ground) and tries all combinations of 2 wires as TCK and TMS; while it does so, it watches the other 4 wires for something that looks like a chip ID. One of the wires will output a chip ID once it hits the correct combination for TCK and TMS; that wire is TDO. You are then left with 3 wires that could be TDI; you can try shifting in a pattern into a wire and see if it eventually comes out on TDO. (You don’t strictly need TRST or nRST.)
Limitations of the software I used meant that the detection of TDI did not work (because I did not tell the software how many bits it would need to shift before they would come out TDO, a number that will vary with each target); rather than fix the software, I just tried each of the 3 wires as TDI and hit it on the third try.
For reference, the pinout (starting at pin 1, with the triangle mark) is: NC, NC, NC, NC, Vref (3.3v), Ground, TRST?, TDI, TMS, TCK, NC (probably rTCK), TDO, nRST?, NC, NC. This matches up well with the ordering of the pins in the standard 20-pin ARM JTAG pinout, a fact that only occurred to me as I typed it out just now.
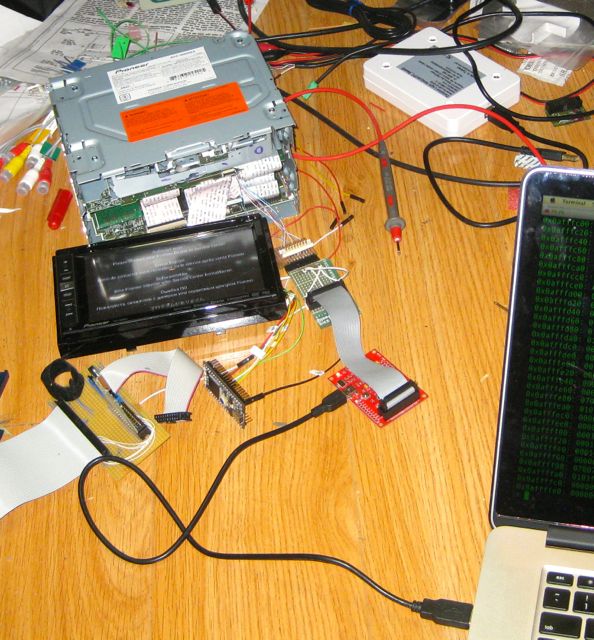
To my surprise, the JTAG interface was not secured and OpenOCD worked with only mild modifications to its imx6.cfg configuration (had to disable rTCK support and experiment to find an appropriate TCK rate). This took a couple of days, and at the end of it I was able to dump out the NOR flash containing U-Boot.
Finding the Password
At this point, it became a straight firmware reversing exercise. Running ‘strings’ on the firmware confirms that it is, in fact, U-Boot; if Pioneer released the source code like they are legally obligated to do, this would have been a little bit easier, but grepping for “password” turned up some promising results:
Jupiter MMC init failed, mmc get bsp password failed
match invalid password 1.
match invalid password 2.
Jupiter MMC init failed, mmc get status failed
Jupiter MMC init failed, mmc unlock failed
Jupiter MMC init failed, first init failed
Jupiter MMC init failed, second init failed
Jupiter MMC init failed, set password failed`

bsp init - init bsp information to init value
bsp get  - get bsp information from nor flash
bsp passwd  <passwd> - set sd card password (16bytes)
bsp set  <item> <value> - set bsp information to nor flash
This serves as some nice confirmation that the password is stored in flash – but it’s not hardcoded into the code, so we’ll have to do some more digging. The fact that it’s set using a U-Boot command suggests that it’s probably an ASCII string. Now that we’re working with a normal ARM processor, instead of that V830 nonsense, we can just load the firmware into IDA and trace the “bsp get” code until we see
ROM:2781083C                  LDR             R1, =0x8250000
ROM:27810840                  MOV             R2, #0x54
ROM:27810844                  MOV             R0, SP
ROM:27810848                  BL              memcpy
ROM:2781084C                  LDR             R1, =0x8260000
ROM:27810850                  MOV             R2, #0x54
ROM:27810854                  ADD             R0, SP, #0xB0+var_5C
ROM:27810858                  BL              memcpy
We know from the datasheet (and from our fun with openocd) that flash lives at 0x8000000, so this is reading something from offset 0x250000 (and 0x260000) from flash. Opening the flash file with a hex editor and seeking to that offset shows a bunch of zeroes … and a 16-byte ASCII string hiding there. This is our password.
We could have also gotten here by using the SD sniffer and watching the CMD42 payload go by, which would have involved a lot of time trying to decode a logic analyzer trace. I would have done this if the SD sniffer I ordered had arrived a day earlier, but I ended up not needing it.
Using the password
This actually ended up being much harder than it should have been. This password functionality is fairly obscure; it seems to be used by some phones to lock an internal SD card, and other people have experimented with it. I found a project online that uses a microcontroller to lock / unlock a card; there are actually four subcommands here that are relevant:
- set a new password (requires an unlocked card) – this locks the card next time it boots
- clear the password permanently (requires an unlocked card)
- unlock the card with a password (takes effect until next boot)
- erase the entire card and the password
In the AVIC system, U-Boot sends the unlock command on boot, and then the unmodified Linux kernel driver will just treat the card as a normal card. The card locks itself when you remove power. Defeating this poses a dilemma – I essentially have a $600 SD card here that I’d really rather not modify, so inserting it into a device to clear the password (permanently) makes me uncomfortable. I could modify this code to unlock the card and dump data out over a serial port, but dumping 8GB of data over serial would take forever. I decided to see if there was a way to do this with a computer; I needed one where the SD card slot was connected directly to the CPU (as opposed to being connected over USB like my MacBook), but not used as a boot device (this rules out the Raspberry Pi).
Novena to the rescue
I was able to use bunnie’s Novena again for this task; it was made easier by the fact that Al Cooper wrote a set of patches for Linux that implement this functionality. I had to do some massaging of the patches to get them to apply to the Novena’s kernel … and my first couple of attempts broke the MMC driver entirely (rendering the system unable to boot off its internal microSD, oops)… but I eventually got the system to boot with the patches.
Unfortunately, these patches are somewhat overengineered for our purposes; they make use of an obscure Linux “KEYS” subsystem to manage the password. This is probably great if you’re using this as an actual feature on a day to day purpose to “encrypt” your SD cards, but I just want to unlock one particular card with one particular password. I ended up just hardcoding the password into the kernel, and then was able to take a similar Transcend SD card from my digital camera and lock it by doing
    # echo setpw > /sys/bus/mmc/devices/mmc0\:b368/lock
    # echo lock > /sys/bus/mmc/devices/mmc0\:b368/lock
I ended up with a card that worked just fine in my Novena, but displayed the same brokenness in my other devices as the AVIC card did. This reassured me that I was on the right track.
I took a deep breath and inserted the AVIC card into the Novena, and …
[139086.060905] mmc0: card is locked.
[139086.060927] mmc (null): Warning: using hardcoded key <redacted>
[139086.073955] mmc0: new high speed SDHC card at address b368
[139086.074380] mmcblk1: mmc0:b368 SDC   7.51 GiB
[139086.077911]  mmcblk1: p1 p2 p3 < p5 p6 p7 > p4
Success!
I’d gone ahead and ordered 2 of what look like the same
Transcend SD card;
other cards will probably work here, but I had no real reason to take the
chance that other cards would implement the command differently. I used dd
to make 2 identical copies of the card, and locked one with the password.
Both the locked and unlocked copies of the card booted successfully in the
AVIC, so I can put away the factory-supplied card and work with my own
normal SD card.
Now it’s just a question of reversing and modifying a standard Android system, something which I have no prior experience doing. That will come in the next blog post, once I manage to modify the system in a useful manner.
Notes
PCB pics
The i.MX6 SoC is on a daughterboard, I linked a top- and bottom-side picture above:
- Daughterboard PCB Hi-res (top)
- Daughterboard PCB Hi-res (bottom)
- Base PCB Hi-res (top)
- Base PCB Hi-res (bottom)
The design of the head unit most likely closely follows Freescale’s
SABRE for Automotive Infotainment
reference design, which also follows a 2-board design. The design files for both
boards can be
downloaded
from Freescale; look under Printed Circuit Boards and Schematics,
it’s “i.MX6_SABRE_AI_DESIGNFILES”. Based on these and the silkscreen labels
on the base PCB (VH1_1, VH1_a, VOTG_1, VOTG_a), I suspect that one of the two rear
USB ports is actually an OTG port (instead of a USB Host port); there are strings
in the firmware that make me think that there’s a hidden debug button in the UI
that would activate USB Device mode on one of the ports and potentially allow ADB
use. Let me know if you find any info on that (I’m already aware of the ‘Set ON’ Video
bypass).
I’m still looking for a UART; CN8052 and JA8502 are connectors for an
iDatalink vehicle integration system and a
SiriusXM Connect Vehicle Tuner
– both contain UARTs,
but I assume (without having actually tested …) that neither is the main serial
console, as the console spew would presumably confuse the device intended to connect
there. As mentioned above, the temptingly-marked signals around the FPGA on the CPU
board (UART0_RTS and surrounding testpoints, F_UART2RX/TX, F_UART3RX/TX, F_UART4RX/TX)
did not produce anything like console spew, according to my logic analyzer.
If you see any testpoints that I should try, let me know in the comments. Many parts are missing because there are more-expensive AVIC NEX models with added features, like a motorized screen and HDMI input.