Enhancing the AVIC-5000NEX - part 2
Introduction
This is the second part of a series of articles on reverse-engineering the Pioneer AVIC-5000NEX. to disable a nag screen; reading the previous post will give some helpful context. This post will focus on understanding the software and actually modifying it to change its behavior; a future post will cover the crafting of an update for other people to use.
System Architecture
Armed with JTAG and OpenOCD, I dumped the 8MB parallel NOR flash to retrieve the SD key; I used that key to copy all the files off the 8GB SD card. The system boots off U-Boot (a fairly-heavily modified version of u-boot-imx); it reads an nvram-like region called the BSP that instructs the system to boot one of five included copies of Linux/Android.
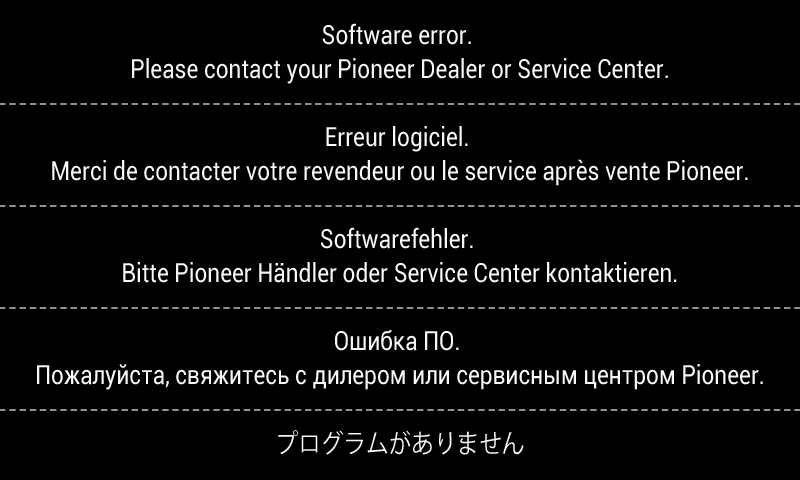
One copy is stored in the NOR flash, and boots when the system fails to load anything off the SD card. I had originally thought that U-Boot displayed the error screen:
I eventually got a very minimal console / root shell out of this, and discovered that it runs a program called EasyRecovery that aims to allow a service center to install an update off SD card or USB drive. We’ll reverse this more later.
Once you unlock the SD card, the partition table looks like this:
Disk /dev/mmcblk1: 8069MB
Sector size (logical/physical): 512B/512B
Partition Table: msdos

Number  Start   End     Size    Type      File system
    1      538MB   548MB   10.5MB  primary   android      boot A
    2      548MB   559MB   10.5MB  primary   android      boot B
    3      559MB   1830MB  1271MB  extended
    5      559MB   590MB   31.5MB  logical   android      recovery A
    6      590MB   622MB   31.5MB  logical   android      recovery B
    7      622MB   1159MB  537MB   logical   ext4         /system
    8      1159MB  1293MB  134MB   logical   ext4         /cache
    9      1293MB  1830MB  537MB   logical   ext4         /data
    4      1830MB  7702MB  5872MB  primary   ext4         /extdata
The “android” partitions begin with a header – “ANDROID!” – and contain a kernel command line, a compressed kernel + loader, and a compressed cpio archive containing a root filesystem ramdisk. You can use William Enck’s split-bootimg.pl to split this into a kernel and a ramdisk. If you can dodge the comments questioning your motivation for doing this, Stack Overflow will tell you to use the vmlinux-extract script that comes with the kernel to extract the compressed image. Unfortunately, neither it nor any of the other tricks I read about online worked, but Matasano’s blackbag “deezee” utility actually worked to extract the kernel from the image:
Linux version 3.0.35 (jupiter@builder) (gcc version 4.6.x-google 20120106 (prerelease) (GCC) ) #1 SMP PREEMPT Sat Jan 11 21:02:20 CST 2014
This indicates that this system is probably derived from Freescale’s Android JB4.2.2_1.0.0 distribution. Good to know. (Jupiter seems to be the codename for the NEX series, we will see this come up repeatedly. NX264 if the codename for the AVIC-5000NEX, according to the resistor and silkscreen on the main board.)
You can unpack the cpio archive / ramdisk to get the fstab which indicates the correct mountpoints for the ext4 partitions. Most of the software from Pioneer is on mmcblk1p7 (/system). Space-wise, most of the SD card is dedicated to /extdata, where there’s a huge iGO directory – this is the mapping software that Pioneer has reskinned for this system (see iGO/ux/pioneer_skin.zip).
Trying to patch Android
I have zero experience reversing Android systems, so I started from scratch here.
There are plenty of other people who would be able to do this with one arm tied
behind their back, so my apologies to them for my crude methods. The caution message
we are trying to avoid mentions the word “attentiveness”, so we go to /system
and grep for “attentiveness”, which shows one hit in framework/JCommonlib-res.apk.
We run apktool to extract the apk.
(apktool d JCommonlib-res.apk jl)
We can then grep for ‘attentiveness’ in the resulting files, and turn up a hit in res/values/strings.xml:
<string name="NAVIM_01_T2_01">"This Navi product is intended solely as a driving
    aid. Review instruction manual and select route before driving. Navi is not a
    substitute for your attentiveness, judgement, and care while driving or moving
    your vehicle. Always observe safe driving rules and driving laws, and follow
    road signs even if they contradict Navi's instructions. By pressing \"OK\" key,
    you accept the license agreement in the instruction manual."</string>
We can then start grepping for NAVIM_01_T2_01, and find a hit in
/framework/framework.odex.
There are plenty of references to decompiling odex files online, but I have
no experience with this. I downloaded baksmali
and ran it on framework.odex (baksmali framework.odex -x -o fr2 -d .)
In the output, we can grep for NAVIM_01_T2_01, and find:
./jp/pioneer/ceam/jcommonres/R$string.smali:.field public static final
                                            NAVIM_01_T2_01:I = 0x2070810
We can’t really grep for 0x2070810 in the rest of the system files, because it will be stored as a binary value in some format. This is a dead end, for the moment, but we’ll come back to this number later.
What followed was a bunch of flailing around, grepping for useful things.
If we go back to the original screen, it starts out “CAUTION!”. Grepping
for ‘caution’ produced a wealth of hits in /app:
./Av.apk
./Av.odex
./JupiterHome.apk
./JupiterHome.odex
./Launcher.apk
./MixTrax.apk
./MixTrax.odex
./Mode.apk
./Mode.odex
./SystemView.apk
./SystemView.odex
./UIService.apk
We need to narrow this down to one or two files to try to disassemble.
Most of these have the same references to caution_*. SystemView.odex
has references to SYS_VIEW_MENU_AUDIO_AutoEQCaution,
SYS_VIEW_PKB_Caution_Main and SYS_VIEW_PL_Caution_Main. AutoEQCaution
doesn’t seem likely, and PKB is probably “parking brake”, but PL_Caution
has promise. Let’s run baksmali on SystemView.odex.
Once we’ve got a pile of .smali files, we can grep for 0x2070810, and find
jp/pioneer/ceam/view/plcaution/SYS_VIEW_PL_Caution_Main.smali:
    const v1, 0x2070810
I tried modifying the .smali files and running them through smali to regenerate the odex file – as tutorials I found online instructed me to do – and there was absolutely no effect. Furthermore,
- Deleting the file had no effect whatsoever – the system still ran
- using dd to overwrite one byte of the file worked – I could modify the string in JCommonlib-res.apk, one byte at a time. Some trivial patches to SystemView.odex worked. Some had no effect. There was no pattern.
- using dd to overwrite the entire file with my reassembled odex caused the system to hang with a black screen.
I needed a way to try to debug this.
Debugging?
adb logcat is the way most people would debug a problem like this. This requires
a USB OTG port, something I didn’t have (as noted in my previous post). Having
a UART would be really helpful right now.
What I ended up doing was grepping the /system partition for ttymxc to see how the serial ports were used. I found several hits in libraries in lib/; running strings on each file and grepping for ttymxc showed the following breakdown of port usage:
- /dev/ttymxc0 – console port (can’t find this electrically)
- /dev/ttymxc1 – Bluetooth module, 115200 bps
- /dev/ttymxc2 – used to talk to “uCom”, which is apparently a “System Microcomputer” (?!?)
- /dev/ttymxc2 – used for the GPS interface (not clear how this is shared with uCom)
- /dev/ttymxc3 – used for RDS / TMC transceiver (not sure how this works)
- /dev/ttymxc4 – used to talk to the iDatalink connector on the back of the unit
- /dev/ttymxc4 – CAN bus interface (not used on my model)
Of these, the one I felt most comfortable hijacking was ttymxc1, the Bluetooth module. These often speak the AT command set over plain UART, and I even knew the expected baud rate. I disconnected the Bluetooth module from the system and verified that it still booted and operated more or less normally – the Bluetooth icon was grayed out, but the rest of the system still worked.
I took the system apart and soldered wires to the RX/TX traces for the Bluetooth module,
and … not much happened. Finally, when I powered the unit off cleanly, I saw
AT*POFF, so at least I had something that worked electrically. I went and modified
the kernel command line (in all 4 places on SD) to point the console at ttymxc1 and …
no change. No console output, and I still got the AT*POFF that was meant for the
Bluetooth module, meaning that the kernel wasn’t claiming ttymxc1 for itself. This
was getting very strange; the system was ignoring half of the modifications I made
to the SD card, and was acting as if it were caching filesystem metadata.
At this point, a friend on IRC looked at my partition map and pointed out that there was no partition covering the first 538MB or so of the SD card. Crap.
Warp!!11
Looking at that unallocated space, I found something that resembled a FAT root directory entry for the following files:
PJ140BOT
PJ140REC
PJ140PLT
CWW8074-
PJCU1-1-E
SNAPSHOT
HIBENDIR
PJ140DAT
Growing increasingly suspicious, I looked further and found some ARM code.
Snapshot ID : %08x
Snapshot total size : 0x
%08x%08x
   compressed size : 0x%08x%08x
   compressed size : 0x%08x
not supported savearea
illegal driver
illegal magic no
illegal snapshot ID
Invalid format version %04x (require:%04x)
--- Check memory ---
--- Write Snapshot ---
Snapshot size overflow. %d%% completed.
Snapshot save canceled.
Halted.
--- Read Snapshot ---
[...]
Lineo Warp!! 4.0.0 (Jupiter14 1.0.1) Tue Jan 14 13:23:03 JST 2014
ARGH. Some googling found a page in broken English advertising Lineo Warp!!
Its features explained many of the problems I was having modifying system state – at the factory, they booted Android, and then wrote RAM out to SD as a hibernate file: (from the website)
Warp!! saves snapshot image of the system memory (while applications are running)
and hardware status (contents of register) to the previously ensured hibernation
area in secondary storage, such as Flash. Once the power is on, directly restore
memory image from snapshot at a burst. By this operation, loads of initiation code
loading and memory accessing are greatly reduced and achieve the high speed.
How does it work?
System requirements

The following are required.
An area where hibernation driver is stored. (ROM 64K)
And area where snapshot of system memory is saved other than a memory area for
Root file system.
    - bootloader
      *Added Hibernation Driver call.
    - kernel
      *Various drivers are implemented to support Suspend/Resume of PM.
      *Apply patch for Warp!! such as Hibernation Driver call.
Sure enough, if we grep for Warp in the U-Boot image, we get
Warp!! bootflag clear %s%d part:%d offs:0x%08x (sect:0x%08lx)
bootflag erase error %d
warp_saveno
Illegal saveno %d
hibdrv read error %d
bootflag read error %d
Warp!! error can not boot %d
clear_bootf
clear Warp!! bootflag
[saveno]
warp
Warp!! boot
Grepping through the kernel showed:
<6>Lineo Warp!! module loaded
warp: %s too large !!
warp: save table overflow
warp_set_savearea: unsupported alignment
kernel/power/warp.c
warp: Can't alloc work memory.
warp: Can't alloc HD savearea memory.
Warp work area 0x%p-0x%p
Warp HD savearea 0x%p-0x%p
I suspect this explains why we have – and will not – see an open-source release from Pioneer;
I am not a lawyer, but I asked Pioneer for the GPL source for this product and they never
responded. I don’t think they can, because they have patched this proprietary Lineo Warp
code into U-Boot and Linux, and they can’t release the modified code because they can’t
redistribute Lineo Warp. UTo my amateur eye, this violates the GPL on U-Boot andLinux.
It’s mind-boggling that someone signed off on this plan. No wonder this system isn’t used more
commonly.
Note: Pioneer just started posting source code; maybe my email inspired them to action. All they have posted, so far, is the U-Boot code, which might be able to explain why I’m getting no UART output from it; unfortunately, I’ve reversed all of this to the point where I no longer expect to get anything useful from any open-source code they release. Nonetheless, good for Pioneer, I hope they continue to do the right thing by releasing all of rest of the open-source code they are using.
Note 2: Pioneer has released quite a bit of source code at the above URL, including the Linux kernel and Quake (?!), so I take back what I said above. They “sort-of” released the source code for Warp!! – it’s basically a wrapper that loads a raw binary “hibernate driver” blob from flash, and then calls into it with function pointers. It’s really gross but probably equivalent to dynamic linking, so they may be GPL-compliant now. I could probably devote a whole blog post to reversing their binary blob, but I don’t think it would actually help me accomplish my goal.
Altogether, I wasted half a week on this stupid software. My path forward was clear – defeat it by making it not load the Warp!! image, and instead just boot plain Android.
The easiest way to do this would have been to have a console for U-Boot. I patched it using JTAG to use UART2 instead of UART1 (replace all instances of 0x02020000 with 0x021e8000). I did that, and nothing happened – I still don’t know why. There had to be a way of making U-Boot automatically bypass the Warp image, because Pioneer’s official updates would have to provide a way of rebuilding that image after installing an update. (The system does not behave like a traditional hibernate / restore system; the hibernate image is only recreated if you update the system.)
BSP
Going back and looking through U-Boot showed the following helpful decoding of the BSP area:
##  A Side BSP Information:
Magic Number     :0x%08lx(a55a5aa5:Valid, other:Invalid)
Boot Mode        :0x%08lx(0:Normal, 1:Recovery, 2:EasyRecovery, 3:Re-EasyRecovery,
                    default:Normal)
Launch Mode      :0x%08lx(0:APL, 1:TestMode.apk, 2:Slave TestMode, 3:Boot Error,
                    default:APL)
TestMode Sub-Mode:0x%08lx(0:TextMode_A.key,1:Serv Mode,2:Tech Mode,default:TechMode)
Bootimage Side   :0x%08lx(0:Side A,        1:Side B,               default:Side A)
Recoveryimg Side :0x%08lx(0:Side A,        1:Side B,               default:Side A)
Debug Switch     :0x%08lx(0:OFF,           1:ON,                   default:OFF)
Usb OTG Switch   :0x%08lx(0:Host,          1:Device,               default:Host)
Memchk flag      :0x%08lx(0:No,            1:Yes,                  default:No)
Warp boot        :0x%08lx(0:Side A,        1:Side B,               default:Side A)
Boot Sub-Mode    :0x%08lx(0:Normal,        1:Catch snapshot,2:Warp,default:Normal)
Update flag      :0x%08lx(0:Recovery-Update, 1:uboot update, 2:boot.img update,
                          3:recovery.img update, 4:system.img update,
                          5:opening data update, 6:UI update, 7:All image update,
                          8:TESTMODE_N.KEY, 9:easyrecovery copy,
                          a:easyrecovery copy&verify, b:password key copy&verify,
                          c:easyrecovery mode change,
                    default:Recovery-Update)
Update sub-flag    :0x%08lx(0:SD Card,        1:USB1,      2:USB2   default:SD Card)
UI Update  flag    :0x%08lx(0:non-updating,   1:updating,    default:non-updating)
Reserved1  flag    :0x%08lx(default:0xFFFFFFFF)
Reserved2  flag    :0x%08lx(default:0xFFFFFFFF)
Lots of good stuff here, though they don’t mention the SD password which is stored here, nor the CRC32 at the end of the BSP region. I used JTAG to modify “Boot Sub-Mode” from 2 (Warp) to 0 (Normal) and the system took slightly longer to boot (26 seconds vs 13 seconds). All this trouble to shave 13 seconds off the boot time.
This ended up working, but it’s not ideal – my system now takes longer to boot and anyone else who wants to reproduce my work must solder JTAG up to patch the BSP. We’ll come back to fix this part up later – I suspect that building an update will solve both of these problems.
Actually patching the code
I’m afraid that the rest of this was rather anticlimactic. I never ended up getting re-assembled odex to work (and never got a working ADB or console) so I was stuck doing a byte-by-byte patch of odex files. baksmali proved insufficient by itself, because it does not display the contents of the odex in raw hex so I couldn’t figure out what bytes to patch to modify its behavior; fortunately, IDA can load odex files (though it can’t resolve the framework references). I ended up finding this function in three files – SystemView.odex, Av.odex and JupiterHome.odex: (note, this is a hybrid of output from baksmali and IDA, edited for clarity)
# Method 6999 (0x1b57)
# public static boolean jp.pioneer.ceam.uicommonlib.common.
                           InfoManager.hasConfirmedPLCaution()
0E18C4 0005 word_E18C4: .short 5      # DATA XREF: 23A8954
0E18D4 1112             const/4       v1, 1
0E18D6 0071 34E8 0000   .prologue_end

0E18D6                  .line 437
0E18D6                  invoke-static {}, <ref MiscController.getInstance() imp.
                                            @ _def_MiscController_getInstance@L>
0E18DC 020C             move-result-object     v2
0E18DE 10F8 0023 0002   +invoke-virtual-quick  {v2}, [0023]
        # Ljp/pioneer/ceam/widget/MiscManager/MiscController;->getNaviPLCaution()
0E18E4 000A             move-result            v0
0E18E6           .local name:'status' type:'I'
0E18E6           status = v0

0E18E6 0133 000C        .line 438
0E18E6                  if-ne         v1, status, return_0

0E18EA 0215 0400        .line 439
0E18EA                  const/high16  v2, 0x4000000
0E18EE 031A 0634        const-string  v3, aInfomanager # "InfoManager"
0E18F2 041A 05A4        const-string  v4, aHasconfirmedpl # "HasConfirmedPLCaution"
0E18F6 3071 0315 0432   invoke-static {v2, v3, v4},
                                  <int Log.d(int, ref, ref) imp. @ _def_Log_d@IILL>

0E18FC        locret:   # CODE XREF: InfoManager_hasConfirmedPLCaution@Z:loc_E1900
0E18FC 010F             .line 443
0E18FC                  return        v1
0E18FE
0E18FE        return_0: # CODE XREF: InfoManager_hasConfirmedPLCaution@Z+12
0E18FE 0112             const/4       v1, 0
0E1900
0E1900        loc_E1900:
0E1900 FE28             goto          locret
0E1900        Method End
In the original Java code, this probably looks something like:
public static boolean InfoManager::hasConfirmedPLCaution(void) {
    if (MiscController.getInstance()->getNaviPLCaution()) {
        Log.d(0x4000000, "InfoManager", "HasConfirmedPLCaution");
        return 1;
    } else {
        return 0;
    }
}
There’s probably a more elegant way to do this – like patching MiscController->getNaviPLCaution(),
but I was weary of this so I just patched the last const/4 v1,0 (12 10) to const/4 v1,1
(12 11) to make this function always return true (1):
$ echo -ne "\x12\x11" | \
    sudo dd of=/mnt7/app/Av.odex bs=1 seek=$((0x1821ca)) conv=notrunc
$ echo -ne "\x12\x11" | \
    sudo dd of=/mnt7/app/JupiterHome.odex bs=1 seek=$((0x536d2)) conv=notrunc
$ echo -ne "\x12\x11" | \
    sudo dd of=/mnt7/app/SystemView.odex bs=1 seek=$((0xe1926)) conv=notrunc
After about 2 weeks of work, the unit no longer displays the CAUTION message. My next goal is to produce my own update that will make the above modifications to the three files, and then rebuild the Warp!! image. This will require reverse-engineering the update format, because no official updates yet exist (something that may change soon). I don’t expect to get it right the first time; while I do have the ability to restore most parts of the system via JTAG and SD, I do not have the ability to see why an update simply fails. I may need to get a real console working, or at least debug logging. Expect the next article to cover debug logging and reversing the update format.
Postscript
I promised some more hardware hacking in this post. A few hours after writing that last bit, I finally got a console working over the Bluetooth UART:
root@android:/ #
The key last step was patching the BSP to enable “Debug Switch”. To be clear, the steps I had to go through to enable this shell were
- Patch all references to ttymxc0 -> ttymxc1 in U-Boot and the 4 Linux images on SD
- Patch BSP to set “Debug Switch” to 1 and “Boot Sub-Mode” to 0 (disabling Warp, a necessary step to make the kernel honor the modified command line)
- Recalculate CRC32 on BSP and write it into NOR flash using JTAG / OpenOCD (add
flash bank $_CHIPNAME.flash0 cfi 0x08000000 0x00800000 2 2 $_TARGETNAMEto imx6.cfg, thenflash erase_address 0x08250000 0x10000/flash write_bank 0 bsp 0x250000) - Disconnect Bluetooth dongle, and solder RX/TX wires to pins 11⁄12:
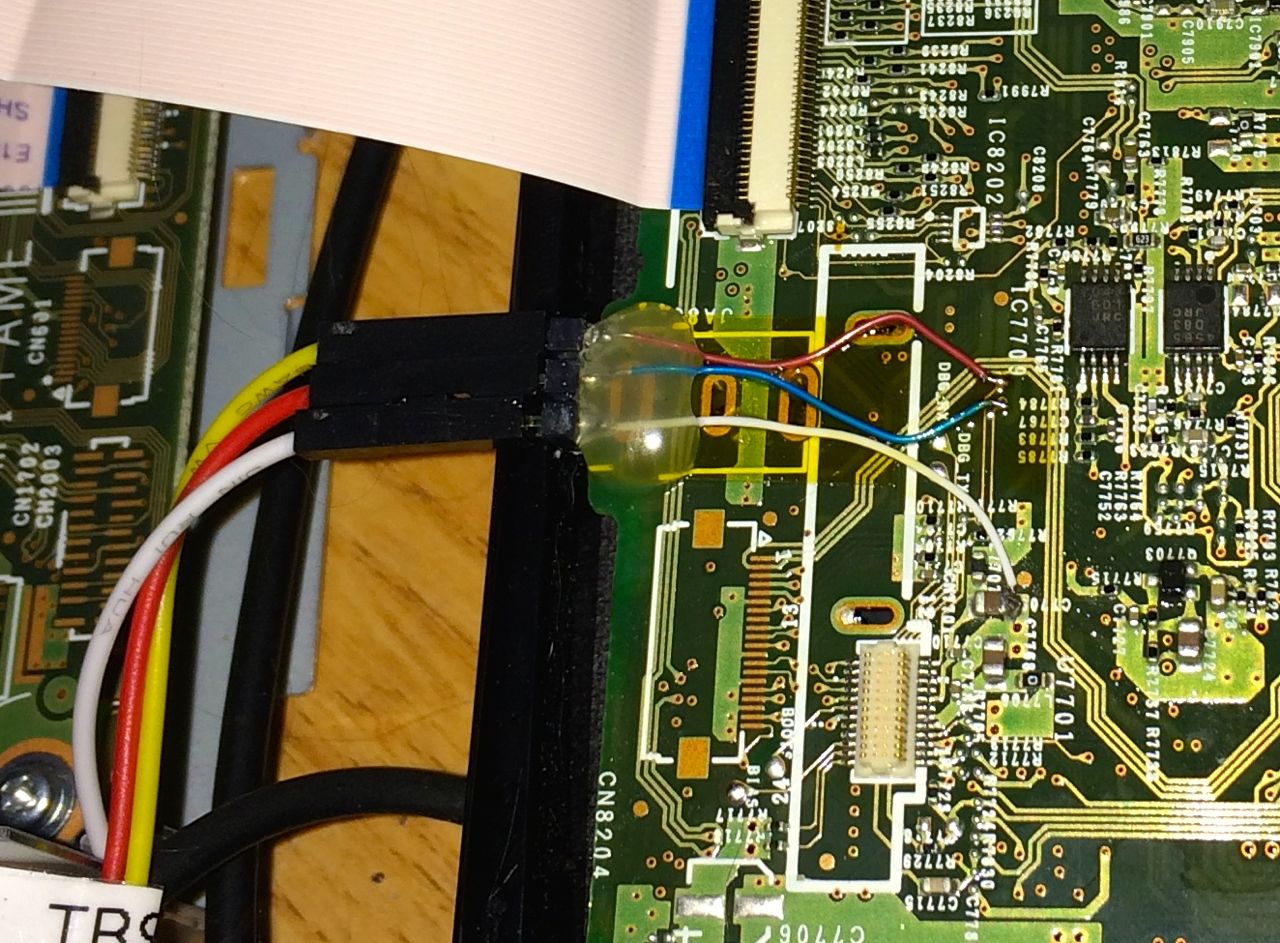
None of these steps should actually be necessary; there’s a ttymcx0 that’s probably hidden somewhere in plain sight, and it looks like there’s a hidden button in the UI to enable the “Debug Switch”. I’d love to hear it if you can find either of these.
Now, the next post will cover the detailed format of the NOR flash, as well as the format of updates. Hopefully, we’ll be able to coax the machine into accepting our own update.